

If you are choosing die-cut bonding materials for automotive interior trim, the safest option is usually not the tape with the strongest advertised adhesion or the part that feels easiest to place in an early sample build. It is the converted bonding solution that can hold trim parts cleanly across heat, vibration, curved surfaces, plastic variation, and long-term cabin aging without creating squeaks, edge lift, read-through marks, or assembly instability.
This is where many trim programs get trapped. A bonding part can look perfect during prototype assembly and still create expensive trouble later, such as local stress on thin decorative surfaces, weak bonding on low-energy plastics, buzz or rattle from partial lift, or appearance complaints after heat soak. If you want to avoid that, you need to judge the bonding material, die-cut geometry, substrate condition, and real trim interface together, not as isolated decisions.
Table of Contents
- 1. Why Automotive Interior Trim Bonding Is Usually More Sensitive Than It Looks
- 2. What You Should Decide Before Comparing Tape or Adhesive Options
- 3. Which Bonding Material Approaches Usually Deserve Review in Interior Trim Programs
- 4. Where Good-Looking Trim Bonding Solutions Usually Go Wrong Later
- 5. How You Can Evaluate the Bond More Like a Vehicle Program and Less Like a Bench Sample
- 6. The Best Interior Trim Bonding Choice Is the One That Reduces Risk Without Creating a New Complaint
- Frequently Asked Questions
1. Why Automotive Interior Trim Bonding Is Usually More Sensitive Than It Looks
You are not only attaching one trim part to another. You are managing surface energy, thermal expansion, cabin aging, appearance quality, vibration behavior, and assembly speed in the same interface.
1.1 A trim bond has to survive real cabin conditions, not just initial placement
In early builds, an interior trim part often looks stable because the surface is clean, the operator is careful, and the sample has not yet seen heat soak, UV exposure, vibration, or repeated cabin expansion and contraction. But once the vehicle enters real use, the bonding interface may start dealing with low-energy plastics, decorative skin tension, adhesive creep, local peel loads, and dimensional movement that were not obvious at prototype stage.
If you choose the bonding part only by initial tack or short-term fit, you may approve a solution that looks neat in the sample room but loses margin once the trim assembly starts living like a real vehicle part.

1.2 A bonding part can solve one trim issue while quietly creating another
A thicker foam tape may help close a gap but create read-through or stress on a visible surface. A harder adhesive system may hold well at first but add buzz, edge tension, or cosmetic distortion after heat aging. A faster-to-apply die-cut part may improve assembly rhythm while becoming less tolerant of substrate variation.
You can see the same approval trap in our earlier guide to automotive camera module sealing materials, where a part that looks acceptable in a controlled build can still become unstable once real integration conditions arrive.
2. What You Should Decide Before Comparing Tape or Adhesive Options
Before you compare acrylic foam tapes, transfer adhesives, or other converted bonding materials, you need to define what the trim bond is actually being asked to control.
2.1 You need to identify the real failure mode first
Some trim programs mainly struggle with edge lift. Others suffer more from squeak and rattle, visible read-through, poor wet-out on textured plastic, or long-term bond loss after heat exposure. If you do not define that first, you may compare materials against the wrong target and approve a part that looks strong on paper but does not solve the actual trim problem.
That is very similar to the lesson from connector sealing structure-versus-material decisions, where the real limit was not the raw material label alone, but which factor actually controlled performance in the assembled interface.

2.2 You need to know what the substrate really looks like in production
Interior trim bonding often fails because teams validate on ideal sample parts but mass production introduces mold-release residue, low-energy plastics, textured skins, coated decorative surfaces, or variable part flatness. A bonding material that works on one clean panel may behave very differently on the real line.
In practice, many trim failures start because the material was chosen before the real substrate condition was honestly tested.
2.3 You need to understand the assembly penalty the die-cut part may introduce
A bonding part that is too soft, too narrow, poorly supported by its liner, or too sensitive to placement speed may create assembly variation even if the adhesive chemistry is technically correct. If the converted part complicates placement, angle control, or compression consistency, the trim interface may become a manufacturing problem instead of a stable bond.
That is why you should judge the final converted part in the actual placement sequence and not only by a material data sheet or hand-applied sample.
3. Which Bonding Material Approaches Usually Deserve Review in Interior Trim Programs
The right approach depends on whether the trim zone needs gap management, stress absorption, surface conformity, strong peel resistance, or a balance of several functions in one converted part.
3.1 Foam-based bonding parts often help when trim interfaces need stress absorption
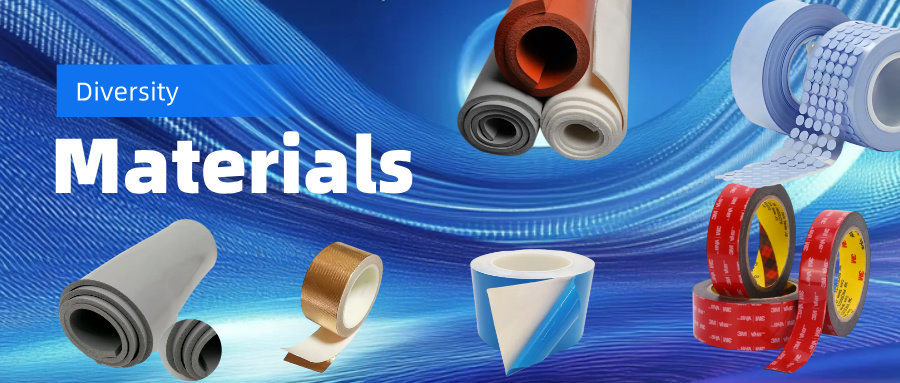
If the trim assembly includes slight gap variation, curved interfaces, or movement between parts, foam-based bonding materials can provide useful compliance and help distribute local stress more gently. In many programs, pages such as VHB foam tape solutions or acrylic foam tape options are relevant starting points when engineers need both bonding and a controlled cushioning effect.
But the key is not whether the foam feels strong in your hand. It is whether the converted part can hold the trim cleanly without creating surface stress, lift, or instability after full cabin aging begins.

3.2 Thin adhesive systems may fit better when stack-up control matters more than gap filling
In some interior trim zones, the biggest concern is not gap management but tight thickness control, clean visual fit, and minimal read-through risk. In those cases, thinner adhesive constructions or carefully designed transfer-style systems may be better than a thicker foam build.
The decision should still be tested against real surface condition and peel stress, especially when decorative layers or textured plastics are involved.
3.3 The best answer is often the converted-part design, not the raw adhesive family alone
In many interior trim projects, the winning solution comes from the right die-cut geometry, adhesive zone layout, liner presentation, and application method rather than from simply switching to a more expensive tape family. The part has to behave correctly during placement, compression, and long-term vehicle use.
That is also why our automotive audio assembly cushioning review matters here. It showed that a part which looks acceptable in isolation can still create buzz, drift, or fit issues once the installed environment starts adding movement and stress.
4. Where Good-Looking Trim Bonding Solutions Usually Go Wrong Later
Most late trim failures appear because the bond was approved around appearance or early handling convenience instead of full-life behavior on the real interface.
4.1 The part bonds well in samples but not on real production surfaces
A bond can look excellent when applied to a clean prototype panel and still fail on production parts that carry texture variation, coating differences, or lower surface energy than expected. Once that happens, edge lift and partial wet-out often appear earlier than teams predicted.
This is why surface truth matters more than sample confidence.

4.2 The bonding layer creates local stress, read-through, or squeak risk
A foam tape that is too thick or too stiff can push visible trim surfaces, distort part seating, or create local tension that slowly turns into appearance complaints. In other cases, a partially lifted edge may not fully detach but can still create buzz or rattle under vehicle vibration.
That kind of hidden margin loss is close to what wire harness cushioning and protection design reviews described, where a protective-looking part could still create bulk, stress, and secondary problems after installation.
4.3 The adhesive choice solves retention but hurts long-term process stability
Some materials bond aggressively enough to survive early pull tests, but they may be too sensitive to placement pressure, too unforgiving on curved paths, or too likely to create scrap when operators need fast repeatable handling. If the process window becomes narrow, line variation can quietly damage long-term trim quality.
That is why the right trim bonding material must protect both retention performance and assembly stability together.
5. How You Can Evaluate the Bond More Like a Vehicle Program and Less Like a Bench Sample
The closer your validation gets to the true trim interface, the less likely you are to be surprised by lift, appearance defects, or late assembly complaints.
5.1 Review the converted part on the actual trim stack-up and surface condition
You should evaluate the part on the real substrate family, with the real coating or decorative layer, in the same curvature and assembly sequence it will face on the line. A loose sample on a flat test panel cannot tell you enough about wet-out, peel stress, visual risk, or long-term edge behavior.
When possible, the most honest review is the one that forces the die-cut bonding part into the same production truth it will later have to survive.

5.2 Ask what combined stress the supplier believes the bond is actually surviving
A capable converting partner should be able to explain whether the main risk is low surface energy, heat aging, peel load, edge contamination, visible stress, or vibration-driven micro-movement. If the answer stays generic, you are probably still looking at a broad adhesive quote instead of a solved trim-bonding application.
This is where broader references such as automotive die cutting solutions help frame the discussion around the final trim function, not just the raw tape family.
5.3 Compare candidates by total trim stability, not by one attractive test result
If one material gives great initial tack but poor heat-aging behavior, while another survives aging but creates visible stress on the trim surface, neither one is fully right yet. You need to compare candidates across retention, appearance, process stability, heat, vibration, and cabin aging together.
That broader comparison usually saves you from approving the part that wins the sample review but loses the vehicle program later.
6. The Best Interior Trim Bonding Choice Is the One That Reduces Risk Without Creating a New Complaint
If you want a bonding part that truly helps the program, it has to hold the trim reliably while keeping the assembly clean, quiet, visually stable, and durable over time.
6.1 A reliable choice usually balances retention, appearance, and assembly behavior together
The tape or adhesive with the strongest isolated claim is not always the one that performs best in the vehicle. In many trim applications, your best choice is the converted bonding part that gives enough holding power while still respecting substrate variation, placement repeatability, and visible surface quality.
That balance is what keeps an interior trim bonding strategy from turning into a downstream fit, buzz, or cosmetic problem.

6.2 You usually get better outcomes when the supplier helps solve the interface, not just ship the tape
A stronger supplier should help you think through substrate condition, converted geometry, liner release, application sequence, and long-term cabin stress before approval. That is much more valuable than simply offering multiple adhesive rolls and waiting for you to guess.
When the material, die-cut layout, and trim interface are aligned early, you are much more likely to get a bonding part that stays clean, quiet, and stable through real vehicle use.
Need Better Support for Automotive Interior Trim Bonding Parts?
If you are trying to improve trim bonding stability without creating appearance, NVH, or assembly risk, it helps to review the substrate, converted-part geometry, and real-use conditions together before approval.
Contact our engineering teamView our automotive die cutting solutions
Frequently Asked Questions
What matters most when choosing die-cut bonding materials for automotive interior trim?
You should focus on the real failure mode in the trim zone, such as edge lift, surface stress, low-energy plastic bonding, squeak risk, or long-term heat aging, then choose the converted part that solves that problem without creating another one.
Are thicker foam tapes always better for interior trim bonding?
No. A thicker foam tape may help absorb gap variation, but it can also create read-through, local stress, fit instability, or visual issues if the trim interface needs tighter stack-up control.
Why do trim bonding parts sometimes pass samples but still fail later?
They often pass because the sample stage does not fully reproduce real production surfaces, cabin heat aging, low-energy plastics, vibration, decorative-layer stress, and long-term peel loads in the vehicle.
Which product pages are often relevant when reviewing automotive interior trim bonding materials?
Common references include acrylic foam tape, VHB foam tape, and broader automotive die cutting solution pages, depending on whether the trim zone needs stress absorption, tight thickness control, or multi-function converted bonding parts.
How can you reduce risk before approving an interior trim bonding part?
You can reduce risk by validating the final die-cut part on the real substrate and trim stack-up, checking visual and edge behavior after heat and vibration, and comparing candidates by total stability instead of one attractive early test result.