

Protective film is only truly successful when it comes off cleanly at the moment the project needs it to come off. That sounds simple, but it is one of the hardest parts of the whole surface-protection process to stabilize. A film can protect the surface well during production and still become expensive at the final removal step if it leaves residue, creates haze, disturbs gloss, pulls at a decorative finish, or forces the team into manual cleanup and re-inspection. When that happens, the project does not just lose time. It loses the efficiency that protective film was supposed to create in the first place. For teams sourcing die-cut protective film solutions, clean peel should never be treated as a bonus outcome. It should be designed as a core requirement from the beginning.
This is where many buyers underestimate the real challenge. They assume the difficult part is getting the film to stay attached, when in fact the final value of the whole film program may depend more on how the part removes than how it goes on. Clean removal is not controlled by one variable alone. It depends on the surface finish, adhesion level, dwell time, process environment, converted-part design, and even the angle and speed of peel during removal. Buyers who already reviewed why protective film leaves residue after removal and why protective film damages painted, printed, or coated surfaces during removal will recognize the same pattern here. Clean peel does not happen by luck. It happens when the project is designed around the real removal event before production ever scales.
Table of Contents
1. Why Clean Removal Is Harder Than Many Buyers Expect
A protective film can appear to perform well throughout production and still create most of its cost at the final removal step.
1.1 Good surface protection does not guarantee good final peel
Many teams judge a film mainly by whether it stays attached and protects the surface during handling. But a film that performs well in those earlier stages can still remove poorly later if the finish is sensitive, the dwell time is too long, or the peel stress becomes too aggressive during final removal. That means early confidence can hide late failure.
This is why a protective film should never be called successful until the removal step is also stable.

1.2 Removal problems often create the most expensive type of rework
When residue, haze, or surface marks appear during removal, the part is usually already close to final inspection or shipment. At that point, cleanup becomes more labor-intensive, quality risk becomes more visible, and the team may need to re-sort or re-inspect finished product. In some cases, the part may no longer be recoverable at all.
That is why removal quality often has a bigger cost impact than buyers first assume.
2. Why Residue, Surface Marks, and Rework Usually Come from a Combined Failure
Most poor removal outcomes are not caused by one simple mistake. They usually happen when several small mismatches overlap at the same time.
2.1 Adhesion level alone rarely explains the whole problem
Buyers often blame the tack level first, and sometimes that is part of the issue, but clean peel usually depends on more than that. Finish sensitivity, dwell time, process heat, contamination, converted-part behavior, and peel method all influence the final outcome. A film that looks acceptable in one environment may remove much worse in another even when the material itself has not changed.
This is why poor removal should be investigated as a system problem, not only as a material problem.

2.2 Small process choices can quietly turn a safe film into a rework problem
A part may sit with film on it longer than expected, move through hotter storage than planned, or be peeled at a less controlled angle than the sample stage assumed. Each of those changes may seem minor alone. Together, they can shift the removal outcome enough to create residue, gloss change, or visual defects that were never visible in early tests.
That is why stable clean peel depends on process discipline as much as material selection.
3. How Finish Compatibility Shapes Removal Quality
The same film can remove cleanly from one surface and badly from another, which is why finish compatibility should lead the clean-peel decision.
3.1 Decorative finishes often have less removal margin than buyers expect
High-gloss coatings, printed surfaces, painted panels, and cosmetic decorative parts may all react more sensitively to removal than the base substrate suggests. That means the same film may behave acceptably on one version of the part and much worse on another that has a more delicate finish on top.
This is why removable protective film should be chosen around the true visible finish, not only the structural substrate.

3.2 A clean sample on the wrong surface is still misleading
If the film is tested on a simplified sample without the final decorative layer, the project may feel falsely reassured about peel quality. Real clean peel should always be evaluated on the same finish the customer will actually see, otherwise the most sensitive surface in the process is never truly qualified.
That shortcut is one of the most common reasons buyers later face surprise rework.
4. Why Timing and Dwell Control Matter So Much for Clean Peel
Protective film removal quality changes over time, which means the removal window itself has to be treated as part of the design.
4.1 A film that peels cleanly today may not peel cleanly later
Short sample tests often remove the film quickly after application, but real production may leave it on the part for days or weeks during work-in-process storage, packaging, or logistics delay. That extra dwell time can increase adhesion interaction enough to change the final removal behavior significantly.
This is the same risk buyers often see in sample-to-mass-production performance gaps, where timing was far more important than the early test suggested.

4.2 Heat and storage exposure quietly change the peel result
Warehouse temperature, packaging pressure, and process delay all influence how the film behaves by the time it is finally removed. Even when the material itself is unchanged, the removal event may feel very different after the part has spent time in a less controlled environment.
For buyers, this means residue-free removal should be validated at the end of the true process window, not only near the beginning.
5. How Converted-Part Design and Peel Method Affect Removal Quality
A poorly designed converted part or poorly controlled peel method can create removal damage even when the film material is reasonably matched.
5.1 Easy-peel design is part of removal quality, not just convenience
If operators struggle to grip the part, peel it smoothly, or maintain a controlled angle, the removal event becomes less consistent and more aggressive. That may increase the risk of uneven stress, local residue, or cosmetic marks even on a film that otherwise seemed acceptable.
This is why easy peel protective film design should be treated as part of the clean-removal strategy rather than a minor ergonomic detail.
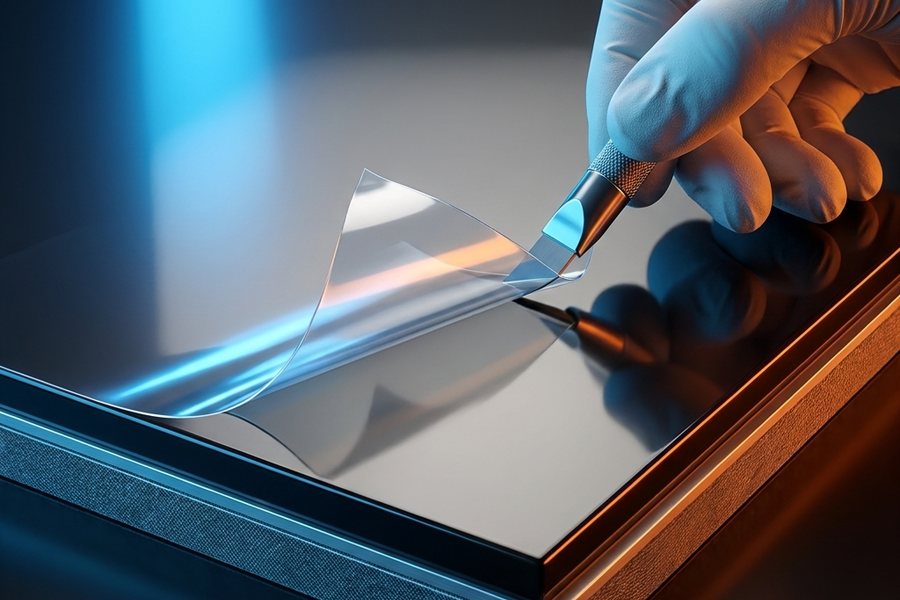
5.2 Small geometry and awkward peel paths make defects more likely
Narrow shapes, detailed cut patterns, and limited peel access can make it much harder to remove the film evenly. Those converted-part constraints often magnify finish sensitivity and increase the chance of local damage or cleanup work, especially on decorative surfaces.
For surface-sensitive parts, the converted geometry should therefore be reviewed together with removal behavior, not after the part is already approved.
6. What Buyers Should Check Before Calling Removal Quality Acceptable
Clean peel should be qualified under the same process conditions that the real part will see, not under the most forgiving sample moment.
6.1 Validate after realistic dwell time, storage, and finish exposure
If the part will go through storage, warm packaging areas, shipping delay, or a long work-in-process route, then the removal test should reflect those same conditions. Otherwise the project may only be approving the easiest possible peel event rather than the one that really matters.
That is one of the main reasons projects later discover that removal quality was never truly validated.

6.2 Check whether the part removes cleanly without extra operator technique
A film is not truly production-ready if it only removes safely when a skilled operator uses special care, unusual patience, or a highly controlled peel motion. A stronger approval standard asks whether the removal remains clean under normal production behavior, not just ideal behavior.
This is often the difference between acceptable samples and expensive rework at scale.
7. How to Build a More Reliable Clean-Peel Strategy
The most reliable projects treat clean removal as a designed outcome, not an optimistic expectation left until the final step.
7.1 Start with the real finish and the real removal event
A better clean-peel strategy begins by identifying the most sensitive finish, the true dwell window, and the actual removal event the production team will face. Once those conditions are clear, the project can choose the film, tack level, converted design, and removal method more realistically.
That is why buyers trying to avoid decorative-surface damage during removal should define removal quality early instead of assuming it will take care of itself later.

7.2 Work with suppliers who understand removal quality as a process issue
At ODT, we help customers improve clean peel by reviewing finish sensitivity, dwell time, liner support, easy-peel design, and actual removal conditions together before production begins. That makes it easier to reduce residue, marks, and final-step cleanup without sacrificing stable surface protection earlier in the process.
For customers working with coated panels, decorative housings, printed parts, and other appearance-sensitive assemblies, our experience with precision die-cut converting for cosmetic surfaces helps turn removal quality into a more controlled engineering outcome.
Need Help Improving Protective Film Removal Quality?
If your team is struggling with residue, cosmetic marks, or cleanup after film removal, ODT can help review adhesion level, dwell time, converted-part design, and finish compatibility before removal quality turns into rework cost.
Contact our engineering teamExplore protective film solutions
Frequently Asked Questions
How can protective film removal be improved without residue or surface marks?
It can be improved by matching film and finish compatibility, controlling dwell time, using better converted-part and easy-peel design, and validating removal under realistic production conditions.
Why does protective film sometimes leave marks even when the surface was protected well?
Because protection during handling and clean peel during removal are not the same event. A film may stay attached well earlier and still become too aggressive or inconsistent by the time it is finally removed.
Why is dwell time important for residue-free removal?
Because the longer a film stays on the part, especially under heat or storage pressure, the more likely adhesion behavior can change and make removal less clean later.
What should buyers check before approving a protective film for clean peel?
They should test the film on the real finished part after realistic dwell time and storage, and confirm that removal stays clean under normal production handling rather than only ideal sample conditions.